PIL (Python Imaging Library) and OpenCV are the most used python libraries for image processing. It is also very common that both two libraries are used in the same project. Therefore, you always need to convert the images between OpenCV and PIL standard. Sometimes you also need the image in binary format, especially when you need to use some Rest API. In this article, I will summarize all these format conversions we need for processing images with Python.
These are the libraries you need to import.
import numpy as np
import cv2
from PIL import Image
from io import BytesIO
PIL vs. CV2
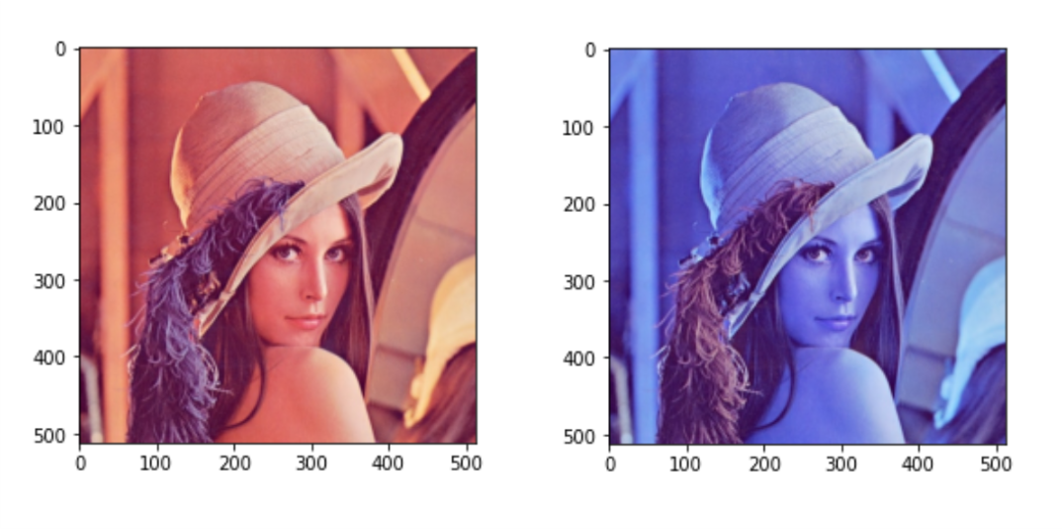
For the grayscale image, you only need NumPy to convert it. But for the color image, we have to do one step extra. Because OpenCV follows the BGR convention but PIL follows RBG convention.
def pil_to_cv2(image):
    '''Convert PIL image to cv2 image
        Args:
            image: PIL opened image
        Returns:
            image: CV2 format image
    '''
    image = np.array(image)
    if len(image.shape)==3:
        image = image[:, :, ::-1].copy()
    return image
def cv2_to_pil(image):
    '''Convert cv2 image to PIL format
        Args:
            image: CV2 opened image
        Returns:
            image: PIL format image
    '''
    if len(image.shape)==3:
        image = cv2.cvtColor(image, cv2.COLOR_BGR2RGB)
    image = Image.fromarray(image)
    return image
In the pil_to_cv2 function we use the NumPy to rearrange the order of color channels. In cv2_to_pil we use the CV2 function cvtColor to do it. If you forget to convert the order of color channels you might get an image like the right one in the picture.
Bytes and Buffer
When you use open() with the image file path, you will get a file object buffer with _io.BufferedReader or _io.BytesIO type. Then we can use the read method to get the binary format of the image.
Normally we will open an image with the following code.
image_path = "lenna.jpg"
with open(image_path, 'rb') as f:
    image_bytes = f.read()
# or
image_bytes = open(image_path, "rb").read()
Try following code you will get: _io.BufferedReader and bytes
print(type(open(image_path,'rb')))
print(type(open(image_path,'rb').read()))
With the following code, you can convert bytes back into _io.BytesIO type.
bytes_buffer = BytesIO(image_bytes)
PIL vs. Bytes
To convert bytes to PIL image we only need to add BytesIO in the PIL Image.open() method.
def bytes_to_pil(image_bytes):
    '''Convert image bytes to PIL image
        Args:
            image_bytes: image bytes
        Returns:
            PIL image
    '''
    image = Image.open(BytesIO(image_bytes))
    return image
To convert a PIL image to bytes without storing, we also need BytesIO() to help us. However, we need to specify a format such as JPEG. In the following example, we used JPEG format. There are also two parameters we can set to guarantee quality: quality and subsampling.
def pil_to_bytes(image):
    '''Convert PIL format image to byte with JPEG format
        Args:
            image: PIL opened image
        Returns:
            JPEG format bytes
    '''
    buf = io.BytesIO()
    image.save(buf, format='JPEG',
                quality = 100, subsampling = 0)
    image_bytes = buf.getvalue()
    return image_bytes
CV2 vs. Bytes
To convert image bytes to CV2 image is more complicated than to PIL. First, we need to convert bytes to NumPy array with method frombuffer. Then, the function imdecode reads the image from the specified buffer array in the memory.
def bytes_to_cv2(image_bytes):
    '''Convert image bytes to CV2 image
        Args:
            image_bytes: image bytes
        Returns:
            CV2 image
    '''
    image_array = np.frombuffer(image_bytes)
    image = cv2.imdecode(image_array, cv2.IMREAD_COLOR)
    return image
The function imencode from CV2 encodes an image into a memory buffer. It will return a Boolean retval which shows whether the operation is successful, and a buffer which is the encoded image in a one-dimension NumPy array. As mentioned above, we also need to give an image extension/format. In the example, we use .jpg.
def cv2_to_bytes(image):
    '''Convert CV2 format image to byte with jpg format
        Args:
            image: CV2 image
        Returns:
             image bytes with jpg format
    '''
    retval, buffer = cv2.imencode('.jpg', image)
    image_bytes = buffer.tobytes()
    return image_bytes
📝 If your image is with .png extension. It might cause errors, because PNG has one color channel more.